Manage Your Own iPhone Photos? Delete iLifeAssetManagement to Recover Lost Disk Space in Mac OS X
 While Photo Stream is a great feature of iCloud, if you self manage your iPhone photos, it can quickly end up eating tons of disk space on a Mac hard drive. How, might a reasonable individual ask? Well, it may be unintentionally adding duplicates of all the photos you’re already importing yourself. This happens because Photo Stream automatically copies images from the iPhone (or iPad and iPod touch) to the Mac. But if you’re self managing your photo collection, you’re doing this as well, thus you’ll end up with duplicates stored on the hard drive, whether you know it or not, and those dups can add up to a lot of storage space rather quickly.
Where are the Photo Stream duplicates stored? A not-so-little directory called iLifeAssetManagement. Thus, if you do not rely on Photo Stream to bring iPhone pictures to a Mac, then you will probably want to turn the feature off, and in doing so you might just save many gigabytes of precious drive capacity in the process. This is somewhat complicated, and is therefore a good addition to the other advanced methods of reclaiming disk space, particularly because it turns off a major feature of iCloud in OS X.
Self Manage iPhone Photos vs iCloud Management
Before beginning, let’s define self management for iPhone photos, because that is who this is going to apply to: in short, that means you transfer pictures from the iPhone to the Mac yourself, manually with a USB connection, through one of the various methods of transfer to copy pictures to the computer using apps like iPhoto, Image Capture, or Aperture, treating the iPhone as if it was a regular digital camera. In other words, you do not rely on Photo Stream to get the pictures from an iOS device automatically copied to something like iPhoto on the Mac, and you do not use the trick to gain direct access to Photo Stream from the Finder. This means you do not use iCloud’s Photo Stream on the Mac at all, this needs to be made abundantly clear because this trick depends on disabling the stream feature in OS X.
1: Back Up iLifeAssetManagement
Manually back up iLifeAssetManagement before proceeding. This is important. You will want to do this because the folder contains pictures, and it’s up to you to find out whether you have those stored elsewhere or not. It’s better to play it safe and back the folder up then to potentially lose photos you don’t have saved already. Manually backing te directory up is just a matter of copying it onto an external backup drive that has abundant storage. This insures that if you discover you did actually use Photo Stream or you did need those pictures after all, you can get them all back quickly.
- Connect an external hard drive to the Mac
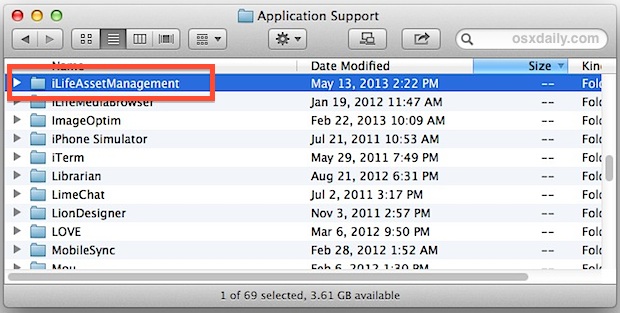
- From the OS X Finder, hit Command+Shift+G and enter the following path:
- Locate “iLifeAssetManagement” and copy that directory to the external backup drive
~/Library/Application Support/
Backed up? Good, now let’s free up the disk space by ditching this folder and stopping it from refilling itself.
2: Turn Off Photo Stream in OS X
Now that you have iLifeAssetManagement backed up (just in case), let’s turn off Photo Stream completely. This is necessary otherwise the iLifeAssetManagement folder will just create itself again after you’ve deleted it.
- From the Apple menu go to System Preferences, then click on the “iCloud” panel
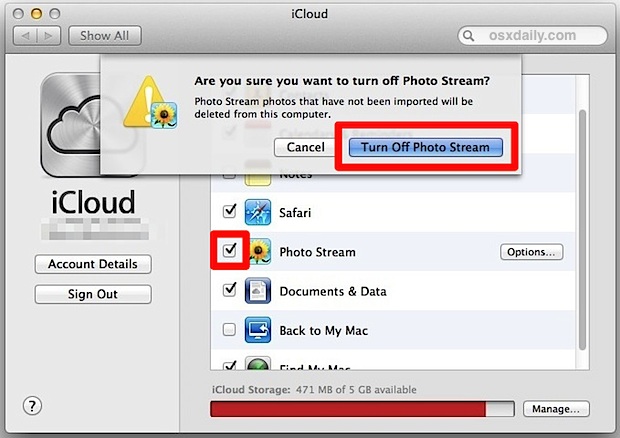
- Uncheck the box next to “Photo Stream” and confirm by choosing “Turn Off Photo Stream”
- Close out of System Preferences

You’ll notice that the control panel says something about images being deleted from the computer, and that’s great but it doesn’t always happen right away. Thus, the next step is to manually ditch the folder and recover all the disk space it has been consuming.
3: Delete iLifeAssetManagement & Recover Tons of Disk Space
On some occasions, the content of this folder will already have been removed by the previous step, but it can be faster to just manually delete the folder yourself:
- Back in OS X Finder, hit Command+Shift+G and enter the following path:
- Select the “sub” folder and drag it into the Trash, then empty the Trash as usual
~/Library/Application Support/iLifeAssetManagement/assets/

You can also delete the entire iLifeAssetManagement folder if you want, though deleting the sub folder is the most precise. If the ~/Library/Application Support/iLifeAssetManagement/assets/sub/ is even 1/4 as large as it was on my Mac, it can take quite a while to delete, so just let it go.
Also, as we mentioned in Step 2, don’t just trash that folder without disabling Photo Stream, otherwise the folder will just recreate itself and repopulate with all the images you deleted.
iLifeAssetManagement = Possible Space Hog
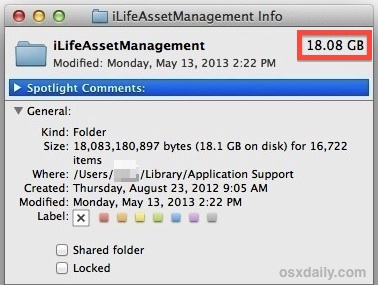
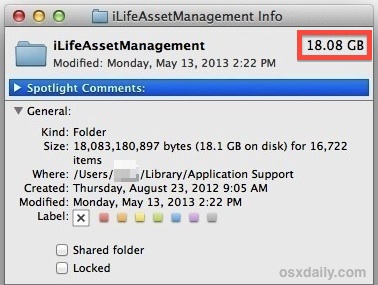
How much space does removing iLifeAssetManagement and turning off the Photo Stream duplicates free up? This is going to vary widely per user and how many photos they take with their iPhone, but in my case I freed up 18GB (!) of space. That’s roughly 1/6th of all available storage on this MacBook Air 128GB SSD, just by deleting a folder that I forgot existed, created by a feature I never use.

If you import your own iPhone photos and don’t use Photo Stream, I highly recommend looking into how much disk space iLifeAssetManagement is taking up on your Mac. It’s fairly easy to not notice this ‘feature’, let alone that it’s storing images on your hard drive, until it’s too late and suddenly your Mac is out of hard drive space. Whether that’s user error, or (more likely) because this aspect of iCloud and Photo Stream is just not explained well, who knows, but even the images inside the directory are not easily accessible (go dig around in iLifeAssetManagement, it’s a disaster with each individual image stored in it’s own subdirectory… who on earth thought that was a good idea?), and combined with it eating up a lot of disk space it’s ultimately far more annoying than helpful for those of us who import manage photos from iOS ourselves.
Optional: Recover All Pictures from iLifeAssetManagement
Before deleting the folder, or if you just want to recover the pictures from the backup you made, here’s what you’ll want to do:
- Go to the iLifeAssetManagement folder (the original, or the backup) and use the Finder “Search” feature in the upper right corner, type “Image” and select “Image” from the Kind option in the drop down
- Select all and move all the pictures to another location in a single folder

That’s the easiest method, but 512pixels offers an AppleScript that may or may not work for you to do this as well, it did NOT work in our testing and just crashed the Finder in OS X 10.8 (perhaps due to the huge folder size in our case), nevertheless, the guy who runs 512pixels is a smart cookie so it’s probably worth a shot if you’re determined to go the AppleScript route and don’t mind tweaking the script slightly.
Got another solution? Let us know on Facebook, Twitter, Google+, or send us an email. Comments are still disabled.


Thank you! Best info / support I found and hopefully done the trick of deleting space on my Mac.
Concerning Spotlight, OSX doesn’t index (=’Spotlight’) many folders, like cache, and apparently this iLifeAssetManagement folder. So it’s not like Spotlight is failing, rather, not designed to index this folder.
I tried this in Yosemite and found that Spotlight and Finder could only locate images in the backup sub folder on the external drive. Finder search is also now failing all sorts of other files, eg. application files, although these do still show up using Spotlight.
I have tried:
– reindexing Spotlight from System Manager: no change and no re-indexing activity seems to take place
– turning “Photos” back on in System Preferences and copying the contents of the backed-up sub folder into the new sub folder: no change
– reindexing Spotlight again from System Manager: no change – no evidence of Spotlight re-indexing and Spotlight and Finder still only locate images in the backed-up sub folder
– I have also tried re-indexing using Onyx: no evidence of Spotlight re-indexing and no change in terms of locating images.
– I have quit and relaunched Finder again and again throughout the above, with no change to Finder search.
I am not happy tinkering with Terminal and cannot reboot at the moment as I have a massive file uploading to the internet with a couple of hours to go.
Have you got any idea why creating the backup then deleting the “sub” folder would have caused Spotlight and Finder to stop locating image files anywhere other than in the backed-up “sub” folder on the external drive?
Quite why Spotlight is not reindexing might be another question, I guess. Could it be something to do with permissions? I have done all this whilst logged into a “standard user” account, entering an admin username and password as and when required.
Any ideas??? Things might revert to normal after a reboot – fingers crossed!