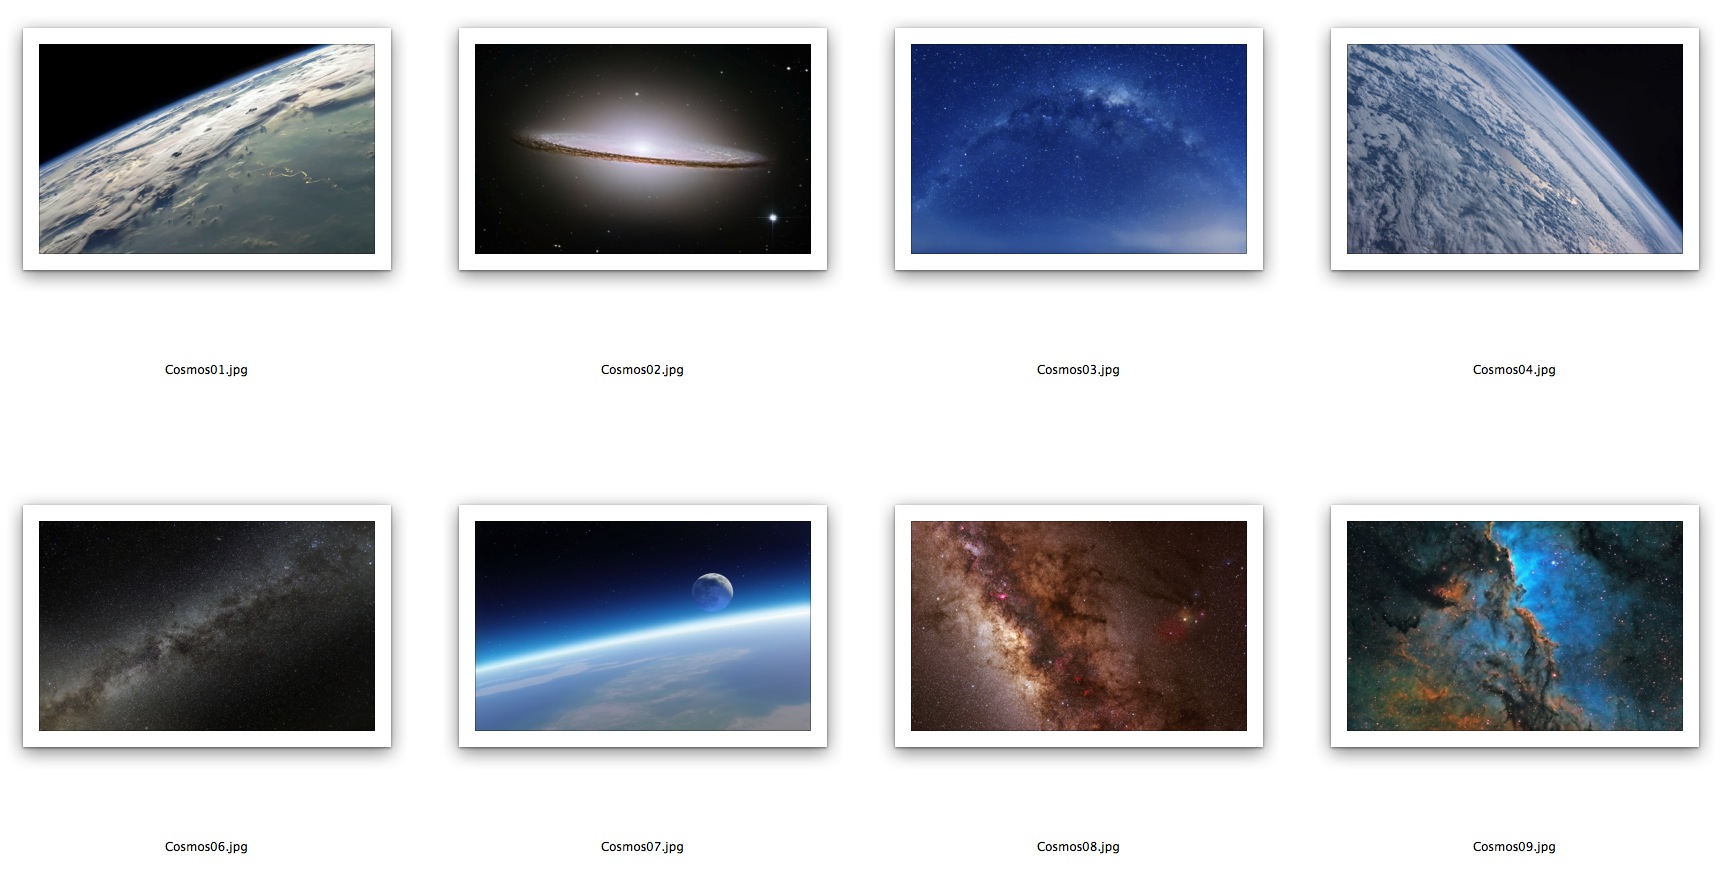
Make Image Proof Sheets on a Mac Quickly with This Trick
Aside from using apps like Photoshop, one of the best ways to make a contact sheet on the Mac is to use Automator to generate the thumbnail sheet as needed. But because Automator requires the usage of an OS X scripting utility, it’s beyond the comfort level of many users, and it also takes time to set up the Automator thumbnail script. If you just need to quickly create a contact sheet of image thumbnails for proofing, you may not have the time for that.
That’s where this trick comes into play, it’ll quickly generate a thumbnail contact sheet of pictures almost instantly and with very little effort. The downside, however, is that the generated quick and dirty proof sheet is not particularly high DPI, meaning you’ll want to keep these for digital usage only – printing them out is just not going to look that good.
Quick & Dirty Proof Sheets By Screen Capturing Large Thumbnails
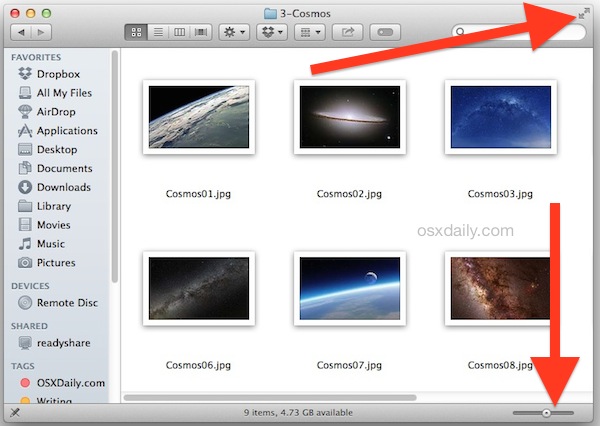
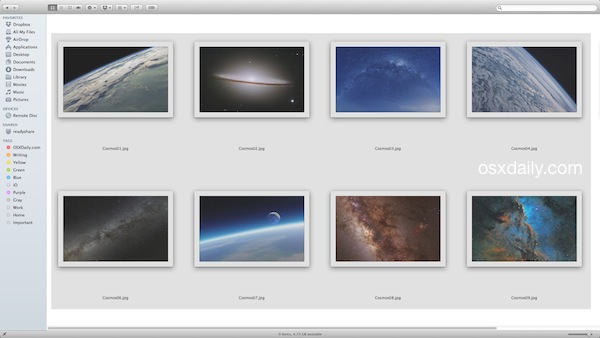
Using Finder fullscreen mode, thumbnail view, and a screenshot, you can instantly create a simple proof sheet of image thumbnails:
- Navigate to the folder full of images you want to create a quick thumbnail proof sheet for
- Click the full screen button in the top corner of the Finder window (or the green button in Yosemite)
- Adjust the thumbnail view slider in the bottom right corner of the Finder window to get the images to the size appropriate for your proof sheet
- Hit Command+Shift+4 to bring up the draggable screen shot utility, and draw a rectangle around the onscreen thumbnails to create the contact sheet
- Now hit the Escape button to exit out of Full Screen Finder view
- Find the thumb nailed screen capture on the desktop, named “Screen Shot (date)” – this is the quick and dirty proof sheet of thumbnails
At this point you can either be satisfied with the screen shot file, or use an app like Preview to crop it down to size and remove the shadows and excess bordering.
As already mentioned, because this is simply a screen shot file and not particularly high resolution, it’s really best used for quick and dirty proof sheets of digital images to get approvals or share pictures through email. The output is really not high quality enough to print out and use in a professional setting, so for those situations where a nice glossy proof sheet is required, you’d either want to generate a high DPI solution through Automator or an app like Photoshop.
This handy trick comes to us from one of our readers, tokyojerry, who left it in the comments on the Automator service post about making a thumbnail sheet generator. If you can’t get that working or just don’t have the time, this may be a valid substitute, try it out.

I’m making a contact sheet of photos as described the article. I am not finding a way to have the file name included with each photo.
Is that an option?
Why would you not just use File>Prints>contact sheet in iPhoto?
So glad you responded, as I was getting more despondent about not being able to figure out how to print contact sheets on my new Mac without my old (Windows) Picasa. Saw your post, tried it, and voila! Thanks.
AAARRRGGGHHH!!!
When I use this method, Preview disproportionately scales height and width to create a square image! This is NOT AT ALL how typical photographs look! It’s almost bearable on µ4/3rds (native: 4:3), pretty ugly for 35mm (native: 3:2) and downright distressing for phone pictures! (native: typically 16:9).
So typically Apple; give me something that is SO CLOSE to what I need, but fatally spoil it!
The method I use is to open up all of the files in Preview, print them, then under the Layout section, set the pages per sheet as a high number. If you then open that as PDF in Preview, or save it as a PDF, you will have a PDF file with the images at their original resolution, but laid out in a neat format.
Wow Carl, that really works well. Thank you.