How to Change the User Agent in Google Chrome
Many advanced Chrome users may occasionally need to change the user agent associated with the browser, typically for testing purposes. Whether you’re a designer, developer, student, tinkerer, novice, or expert, changing the Chrome user agent isn’t particularly difficult, but it is hidden within a section of Chrome that most users never interact with; the developer tools.
Here’s how you can change the user agent in the Chrome web browser, it works the same on Chrome for Mac, Windows, or Linux.
How to Change User Agent in Google Chrome Browser
The following steps will change the user agent in Google Chrome:
- Open Chrome on the computer
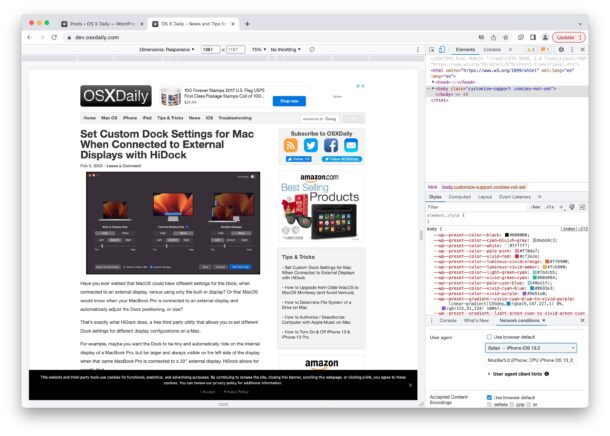
- Click the three-dot icon in the top corner of a browser window to access miscellaneous menu, choose “More Tools” > “Developer Tools”, otherwise go to View menu > Developer > Developer Tools
- From the Console section, choose “Network Conditions” (if you don’t see this, click the three dot menu within Developer Tools > More Tools > Network Conditions
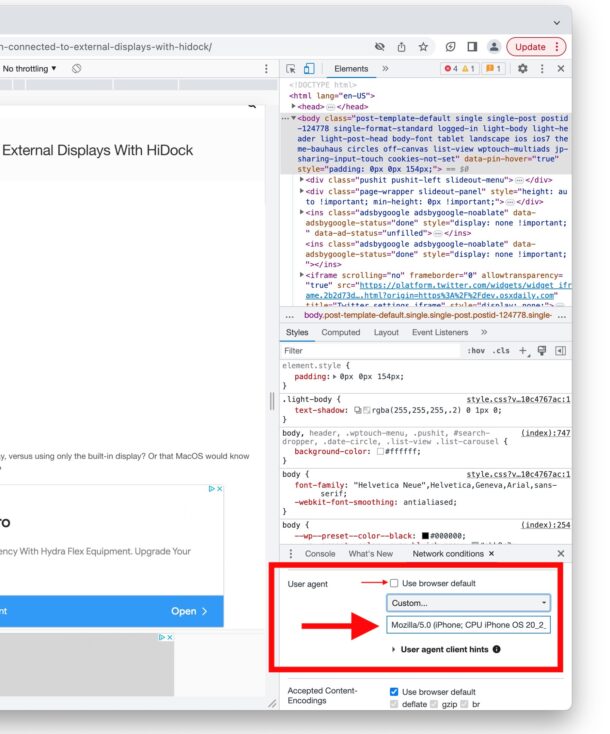
- Uncheck the box for “Use browser default” / “Select automatically”
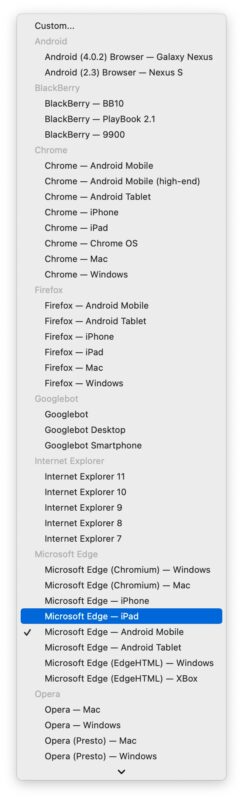
- Click into the dropdown menu and choose the user agent you want to use in Chrome
- Optionally, choose “Other / Custom” to set your own user agent
- Refresh the page to have the new user agent take effect in the current browsing session
That’s how you change the user agent in Chrome.
The user agent change will stay in effect for the current window or tab only, but for as long as the browsing session lasts. This makes it easy to test sites, check code, troubleshoot, design, develop, or tinker within the Chrome browser.
Restoring to Default User Agent in Chrome
You can change the user agent back to the Chrome browser default by returning to the Network Conditions section of Developer Tools, and checking the box within User Agent for “Use browser default”.
- Open Chrome
- Click the three-dot icon in the top corner of a browser window > choose “More Tools” > “Developer Tools”
- Click the three dots menu within Developer Tools (this is below the other three dots menu… yes there are two three dots menus on the same screen, a fascinating UI/UX decision) and now choose More Tools > “Network Conditions”
- Check the box for “Use browser default” / “Select automatically”
- Refresh the page to return to the default user agent for the current version of Chrome
The default user agent in Chrome will change as you install updates to the Chrome browser, but will by default always show the device and operating system as well.
