How to Show the Expanded Print Details Dialog in Mac OS by Default

Do you frequently access the detailed printing options when printing from a Mac? If so, you’ll really appreciate this trick to always show the expanded print dialog window and settings screen.
For some quick background, typically when you go to print if you want to see expanded printing options like print paper orientation and paper size, you’ll need to click the “Show Details” button when printing a document. But with a little command line trick, you can make the expanded print dialog window the default setting in Mac OS when printing, so that you won’t have to click “Show Details” every time you print a document to make adjustments.
The expanded Print dialog window in Mac OS shows many additional print details and configuration options for printing documents, including specific page counts, the page and paper print orientation, paper size, preset settings options, printing double sided, printing borders, whether to print the header and footer of a file, whether to print in black and white or use color ink cartridges, and much more depending on the document in question and the app doing the printing. This is all quite useful information to adjust and toggle as needed for people who do a lot of file printing from a Mac, so this article will discuss how to make the expanded printer options showing all these details (and more) available by default with each print attempt.
How to Always Show the Detailed Print Dialog in Mac OS
This will change the default print setting in Mac OS so that every time you go to print a document, the fully expanded detail print dialog shows.
- Open the “Terminal” application in Mac OS, located in the /Applications/Utilities/ folder (or you can access through Spotlight or Launchpad)
- Enter the following defaults command string exactly:
- Hit Return to execute the command, there won’t be any confirmation in the terminal
- Now return to any document, webpage, etc, and go to File > Print to see the expanded print dialog shown by default
defaults write -g PMPrintingExpandedStateForPrint -bool TRUE
You shouldn’t need to restart the Mac or relaunch any apps for the change to take effect, but if you have an active print dialog window open when you use the command you’d need to close it and start the print process again by summoning it through the File menu or the Print command.
Here is what the full expanded print dialog window looks like from TextEdit on a simple plain text file:
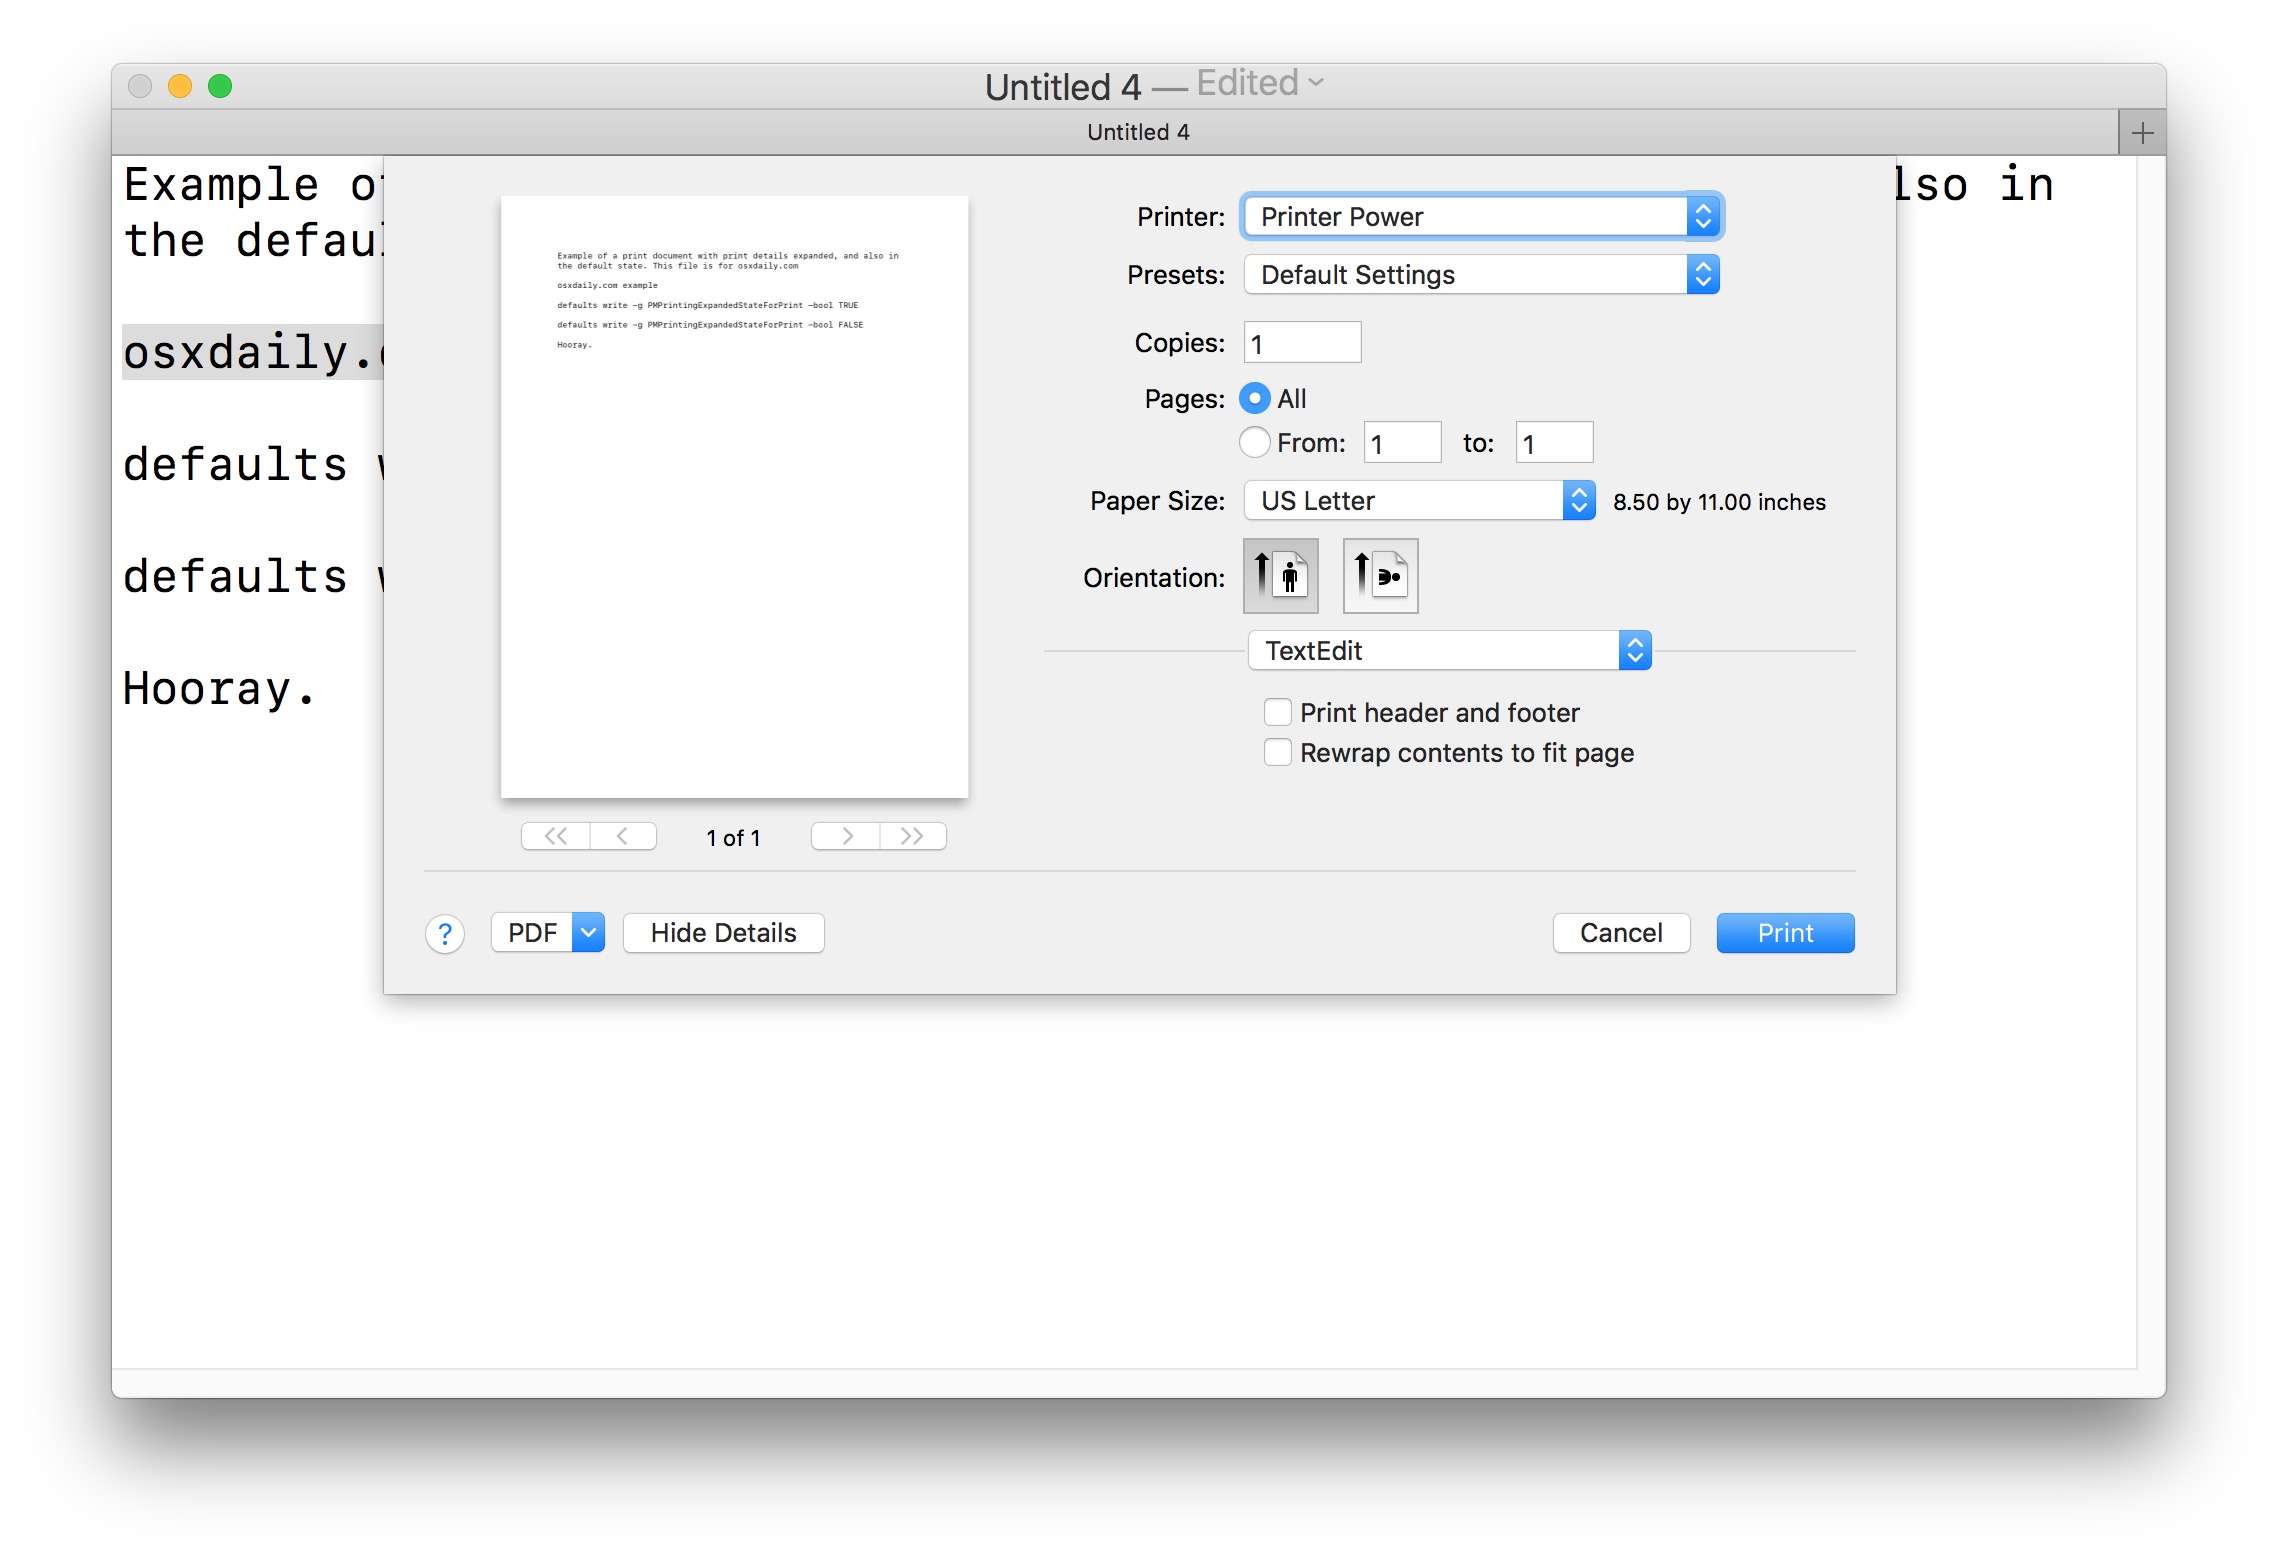
Typically to show those additional printing options you’d need to click the “Show Details” button at the print dialog, but with this defaults setting it becomes the default.
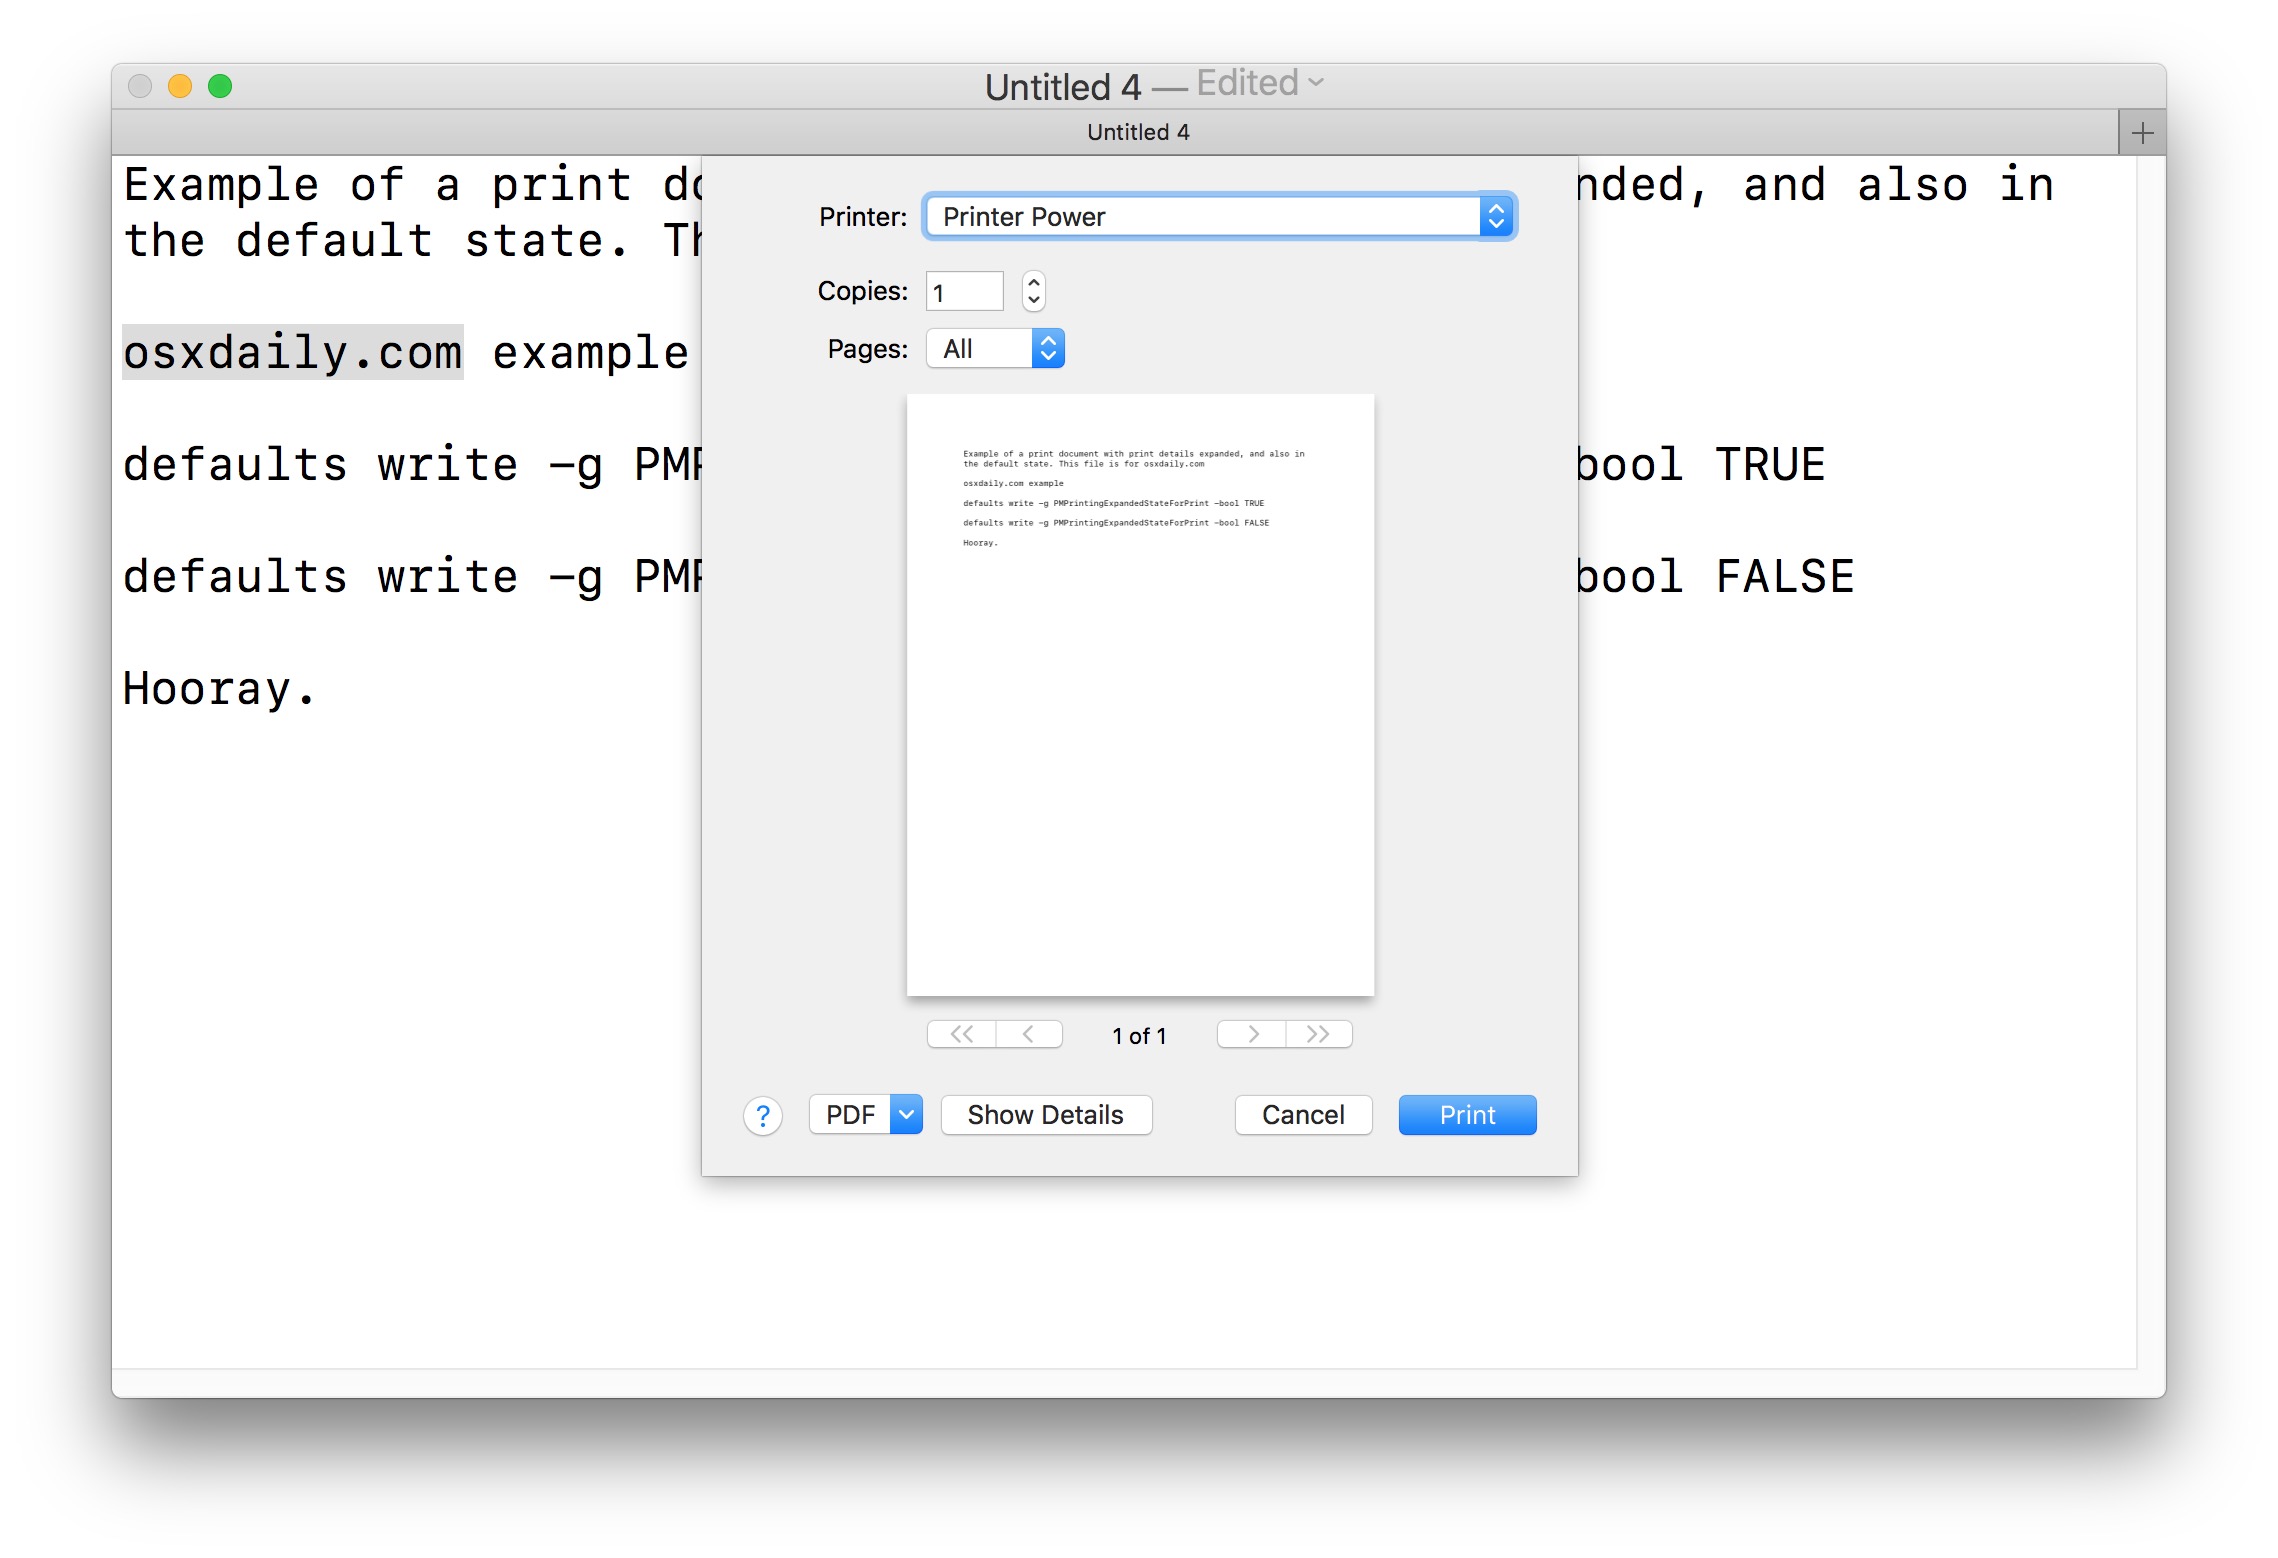
Compare that to the default print dialog window with much fewer options and customizations for the print effort:
This will impact all new printing attempts on the Mac, expanding all details of printing options available, and from all apps too, whether you’re printing a document to a printer or even printing to PDF on the Mac, and whether its a local or network printer doesn’t matter either.
The command works on just about every version of macOS and Mac OS X, regardless of how the m in Mac is capitalized and whether or not their are spacing in between the characters of the version name.
How to Return to Default Print Dialog Screen in Mac OS
If you have decided you do not want to see the expanded print dialog in Mac OS by default and you’d rather click the “Show Details” button at the Print dialog yourself, then you can reverse the command syntax:
- Open the “Terminal” application in Mac OS
- Issue the following command and then hit return:
- Exit Terminal as usual
defaults write -g PMPrintingExpandedStateForPrint -bool FALSE
That will return MacOS to the default state of not showing the full expanded print window.
This trick is similar to another defaults trick that sets the expanded Save dialog to show as the Save default in Mac OS, and if you like as many options as possible available to you when saving or printing documents you’ll probably want to enable both of these tricks on your Mac through the defaults command strings.
Do you like the expanded print dialog window on a Mac? Do you have any printing tricks up your sleeve? Share your comments below!

Hi,
Is this terminal command still useful if you are using macOS Ventura 13?
THANK YOU! This is exactly what I needed – I was so frustrated trying to find the extra settings that were missing. This worked perfectly!
The excellent, free program, Tinker Tool, lets you set this (and many other features) up easily. It’s been around for a long time. Any long time Mac user will vouch for its stability and reliability.
TinkerTool has no way to set “always show the detailed print dialog in Mac OS.”
For me this did not work until I issued the command as sudo. WHich seems odd because I run with admin level. Regardless a useful tip. Thanks.
Hello, when using Keynote, how do you create a red box around a portion of text that is part of an image that has been inserted into a slide.
defaults write -g writes to the global preferences domain, over which the application domains take precedence. If you want this to work in Safari, Firefox, Chrome, etc., then use their preferences domains instead, e.g.
defaults write com.apple.Safari PMPrintingExpandedStateForPrint -bool TRUE
If you want to choose what you want to print in a web page, use PrintFriendly & PDF. It installs a button in your browser. https://www.printfriendly.com/
I thought for 10.7+ it switched to this?: defaults write -g PMPrintingExpandedStateForPrint2 -boolean true
That worked, thanks cashxx.
Doesn’t work for me on High Sierra 10.13.3
Even after checking it using defaults read -g PMPrintingExpandedStateForPrint (which returns 1), I still get the non expanded print options.
I’ve not rebooted or logged out but I have run a killall Finder.
Same here, but I’m on Sierra, 10.12.6
What I would really like to know is how to make Chrome use the MacOS print dialog by default…
To force Chrome to use the OS X print window, try this:
defaults write com.google.Chrome DisablePrintPreview -bool true
I am not a regular user of Terminal commands so I get excited when I do things under the hood that magically work.
This page’s discussion is interesting & helpful ~ Thanks to all for these suggestions!
Sharing that I did try cashxx’s ‘force Chrome’ command and experienced Chrome/Mac OS failing to generate hyperlinks for PDF print jobs after executing the command. I actually find Chrome’s reliable print-hyperlinking to be one of its few selling points [to be fair, I just recently updated my Late-2011 MBP from Mavericks to High Sierra so I’m behind-the-curve if Safari / others have joined the (reliable-PDF-hyperlinking) party] so I chose to revert by entering (see paul’s post below):
defaults delete com.google.Chrome DisablePrintPreview
Then, after quitting and reopening Chrome, Chrome’s print preview was back and so were the hyperlinks embedded in the PDF’d webpage!
Now if we can just delete COVID-19 as easily….Be well all!
defaults write -g writes to the global preferences domain, over which the application domains take precedence. If you want this to work in Chrome, Safari, Firefox, etc., then use their preferences domains instead, e.g. defaults write com.apple.Safari PMPrintingExpandedStateForPrint -bool TRUE
It looks like mine is showing the showing the expanded print dialog every single time even after issuing the second command:
defaults write -g PMPrintingExpandedStateForPrint -bool FALSE
Interesting. Try to Click on “Hide Details” and it will hide the expanded print options.
You can also usually use a defaults delete command, which is opposite of defaults write (it deletes from the plist rather than writes to it). That might look something like the following:
defaults delete PMPrintingExpandedStateForPrintAnd there’s defaults read too if you want to see current setting:
defaults read -g PMPrintingExpandedStateForPrint