How to Edit Photos on iPhone & iPad
Editing photos on iPhone and iPad is now better, easier, and more powerful than ever before, as you’ll quickly see in this guide.
The default Photos app that’s baked into iOS has long provided some basic editing tools and a variety of filters for quite a while now. This was good enough for users to quickly add some extra flair to the photos they captured on their iPhones and iPads. However, for any further refinement, most people resorted to popular third-party editing applications like Snapseed, VSCO, Photoshop and more. Now, with the advanced photo editing tools that iOS 13 and iPadOS 13 (and later) Photos app brings to the table, you probably wouldn’t need to use a third-party photo editing app anymore. Apple has constantly improved the editing tools with each new iteration of iOS, but this time around, they’ve taken things to a whole new level.
We’ve reached a point where you iPhones & iPads running iOS 13 or later have arguably the best native photo editing tools in any smartphone or tablet right now. Sounds pretty great, right? If you’re interested in learning what’s new and how you can use these advanced photo editing tools, you’ve come to the right place. In this article, we’ll be discussing how you can fine-tune your photos on your iPhone & iPad running iOS 13, without the need for any third-party application.
How to Edit Photos on iPhone & iPad
The photo editing tools within the stock iOS 13 Photos app are neatly categorized into three separate sections, namely Adjustments, Filters and Cropping. This categorization is necessary to make the editing process more straightforward for all users. Take a look at the steps below to learn what all these tools can do and how you can use them in your photos.
-
- First open the Photos app on iPhone or iPad, and find the picture you want to edit
![]()
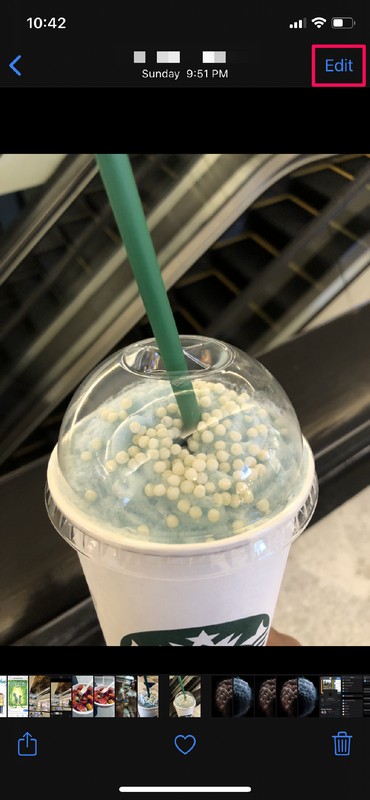
- In order to start editing, simply select the picture you want to enhance and tap on “Edit” located at the top right corner of your screen.

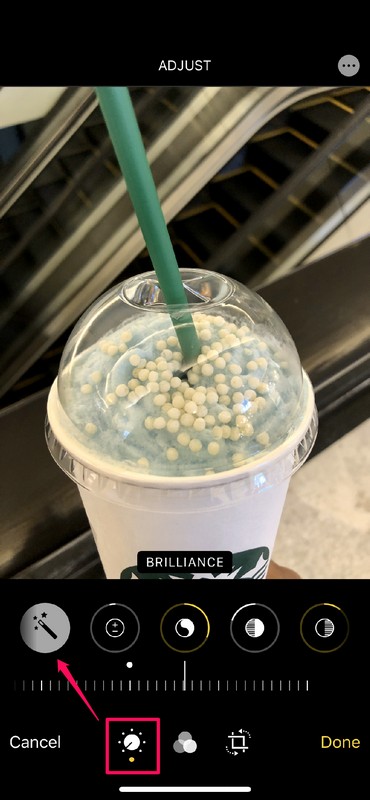
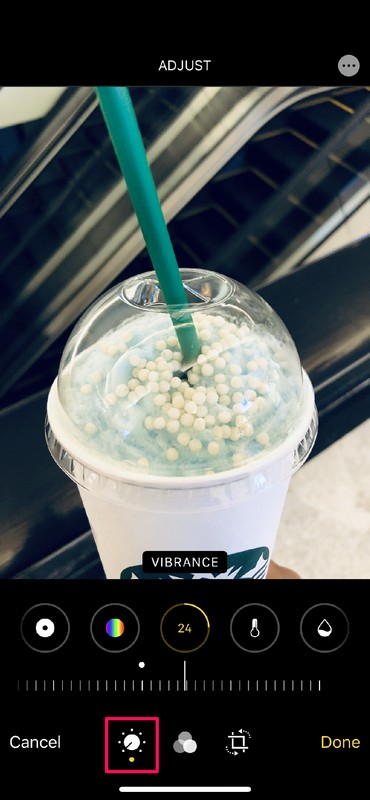
- In this editing menu, you’ll notice the icons for Adjustments, Filters and Cropping section from left to right, at the bottom of your screen. Every time you open the editing menu, the app will take you directly to the Adjustments section. The first tool here is called “Auto” which is indicated by a “Magic wand” icon. If you tap on it, the app will automatically enhance your photo by using the other tools available.
- If you aren’t satisfied with the result, you can simply tap on the “magic wand” icon again to remove the auto-enhancement and proceed to manually edit your photo with the rest of the tools available. Or you can use the specific image editing adjustments we’ll discuss next.
If you want to go beyond the auto enhancement features, then using the individual image editing tools gives a lot of fine control to photo adjustments.
Photos Image Editing Tools & What They Do on iPhone & iPad
We’ll briefly describe what each and every Photos editing tool does starting from left to right, so you can use them according to your preference.
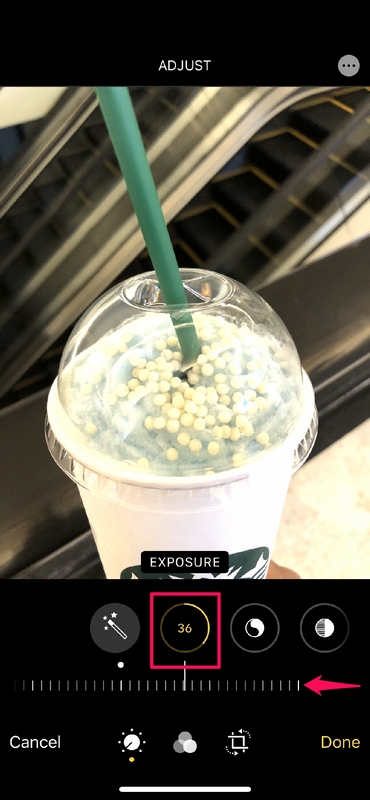
- Exposure: This is the first manual tool which is located right next to the “magic wand” icon. It’s a tool found in the even the most basic photo editing applications. Simply use the slider below it to control the light in your picture. Dragging the slider to the left will over-expose the image, whereas dragging it to the right will under-expose it.
- Brilliance: This tool located right next to the Exposure setting, focuses primarily on the darker areas of the picture. Increasing brilliance using the slider will brighten up shadows and adjusts the overall contrast.
- Highlights: The next tool focuses only on the lighter parts of the image. If you wanna make a white cup look even whiter, simply drag the slider to the left
- Shadows: As the name suggests, this tool has zero effect on the bright parts of the image. Instead it focuses on the shadows, and can be used to make the darker sections appear even darker, or brighter.
- Contrast: This setting could either make or break your image. It brightens up the lighter areas and blackens the darker areas if you try increasing it. Decreasing contrast will result in the image appearing washed out.
- Brightness: As the name suggests, this increases or decreases the brightness of your image depending on the direction you’re dragging the slider.
- Black Point: This tool works fairly similar to Shadows, by adjusting the darker portions of your picture, as per your preference.
- Saturation: This is also a tool found in most photo editing applications like Photoshop, Snapseed, VSCO, etc. It adjusts the color saturation by increasing or decreasing the intensity of colors in your image.
- Vibrance: Another setting that’s quite popular among photo editing apps which makes the colors pop without ruining your picture. It primarily adjusts the intensity of colors that appear muted, and the effect can be quite pronounced in a positive way.
- Warmth: This tool is known as “Color Temperature” in most other photo editors. Dragging the slider to the left will result in a warmer image, whereas dragging it to the right will make it cooler.
- Tint: It controls the color balance in your picture by giving the picture either a greenish or purplish hue.
- Sharpness: If you couldn’t tell, this setting as the name suggests, adjusts the overall crispiness of the image.
- Definition: This tool focuses on the edges and borders of the objects in the picture, making it appear more detailed. In advanced terms, it refines the focal points of the photo.
- Noise Reduction: If you take a picture in poor lighting conditions, you’d notice grain in the darker portions of the image. This tool alleviates it by smoothing out the entire image, which could result in a loss of detail if not used properly.
- Vignette: This setting simply darkens the corners and edges of the frame to give the picture a retro feel.
It’s worth noting here that the last few tools that we discussed here, like Vibrance, Tint, Sharpness, Definition, Noise Reduction and Vignette were all added as a part of the latest iOS and iPadOS versions.
That’s a brief description of all the 16 tools in the image adjustments section, but like many features you should try them out yourself to learn which you like best and what is most appropriate for your photo editing needs.
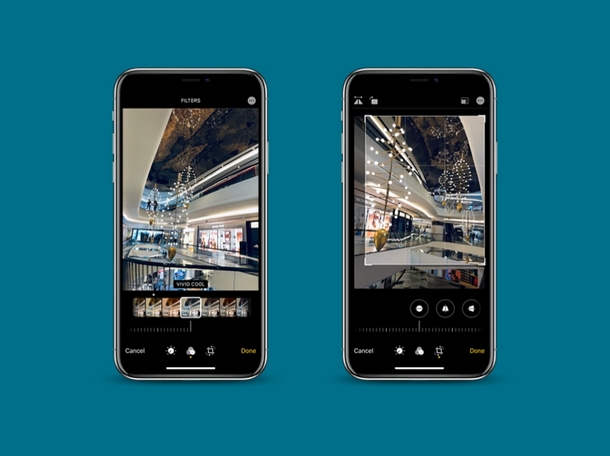
Photos Filters & Editing with Filters on iPhone & iPad
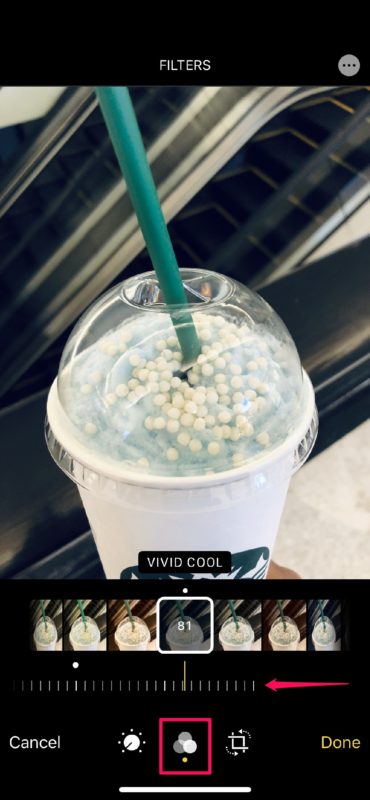
Next, let’s move on to filters and an interesting new capability they offer. Tap on the middle icon indicated by three “overlapping circles” as shown in the screenshot below. This will take you to the very familiar “Filters” section. There are a total of ten filters to choose from, just like you did in the previous version of iOS. However, this time around, you can adjust the intensity of each and every filter by using the slider right below them.
Photos Image Cropping, Skewing, Mirroring, & Editing
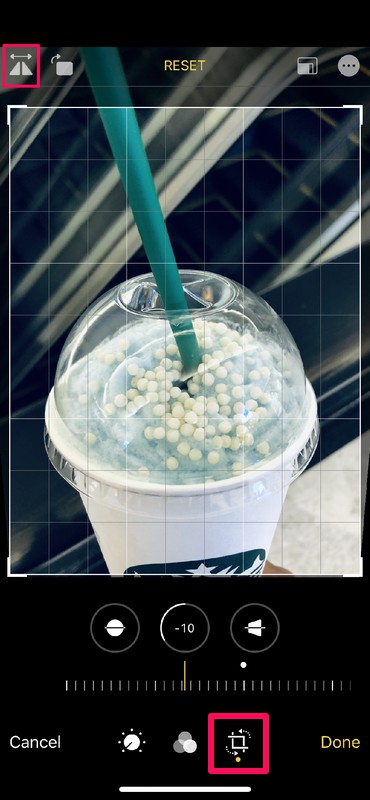
The next section is where you get to crop your photos and frame them in a better way. However, that’s not the only thing you can do here.
There are horizontal and vertical skewing tools that lets you skew the image by adjusting the slider, as shown in the screenshot below.
Additionally, if you tap on the “two-sided arrow” icon at the top left corner of your screen, your image will be mirrored.
This is pretty useful if you’re editing selfies, as the stock Camera app flips the image right after capturing it, since what you see on the viewfinder is simply a mirror image of yourself.
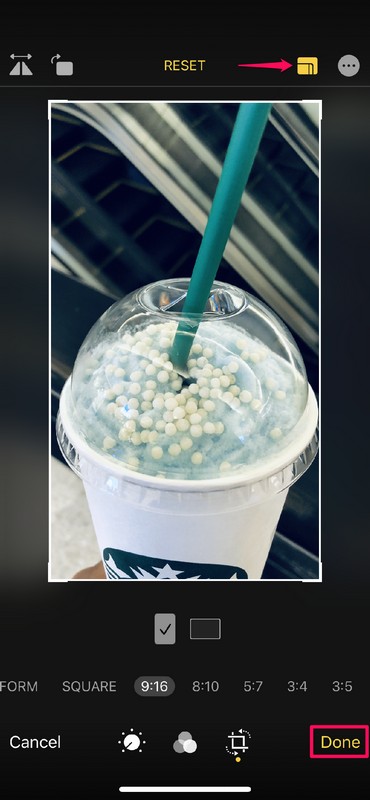
Apart from that, if you want to crop your image to a specific aspect ratio, simply tap on the rectangular icon right next to reset, and choose from a variety of popular aspect ratios including 1:1, 16:9, 4:3 and more.
Lastly, once you’re done editing, simply tap on “Done” to finish the process and save the fine-tuned picture.
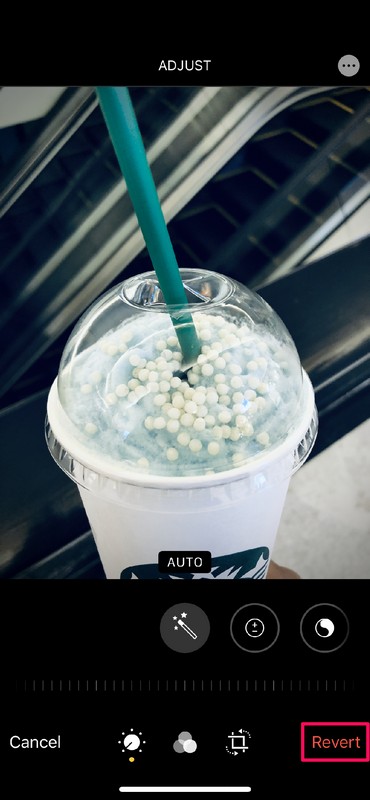
How to Undo & Revert Photo Edits & Image Adjustments on iPhone & iPad
If you’re not satisfied with your edit or if you want to re-edit the picture from the ground up for whatever reason, simply go to “Edit” and tap on “Revert” at the bottom-right corner of the screen.
This will revert the image back to its original unedited state.
That’s a summary of much of what you can possibly do with the updated Photos app on the latest versions of iOS and iPadOS from iOS 13 and later. That’s a fairly significant list of editing tools and capabilities, isn’t it? Thus many users may no longer need to use any other third-party photo editing app on your iPhone and iPad. Users have access to basically every image editing tool, if not more, found on many other popular photo editors and apps.
Image Editing Features Apply to Videos Too
But there’s more! We haven’t gotten to the one of the best parts of the stock Photos app yet. It can do something that most other photo-editing apps on the App Store are not currently capable of.
Every single photo editing tool that we discussed above can be used to edit videos as well, right from the Photos app.
That includes things like adding filters to videos on iPhone and iPad too.
Sure, certain Android phones have video editing baked into the photos app as well, but none of them offers the set of tools and flexibility that Apple’s Photos app has to offer. That being said, the competition might be taking notes and come up with similar functionalities within a few months or so. For now though, Apple’s Photos app is arguably unmatched.
We can partly thank Apple’s newest flagship iPhones because if it wasn’t for their updated and advanced camera systems, it’s possible that Apple would not have made such a major focus to revamp their Photos app.
Do you use the default Photos app for editing photos and pictures on your iPhone or iPad? Have you switched to the stock Photos app for editing all your photos and videos? What third-party app image editing app do you use instead, if any? Do let us know your thoughts and opinions on the redesigned Photos app in the comments section down below.

The new editing features are great. I like to import photos from my camera and delete those not so good and the optimise the best ones. I export these to Windows10 (ahem😢) for archive and album & tv presentations. What is the best way to export these with all the edits preserved?
I currently airdrop them to my iPhone, which flattens the photo files and then export from there. Would love to do in a single step (without buying an iMac!)
One feature I use a lot in Photoshop is the silhouette feature. I can cut out all the background of any specific photo and just have the photo in it. Wish that was in iOS and iPad 13!
Agreed completely, masking and silhouette would be useful. You have something similar in Mac with Preview app though, it’s just not near as smooth.
I suppose that’s what portrait studio mode camera options kind of do too… but I don’t think it looks as sharp as photoshop
I wish I could label photos to find them as easy as I can on my Mac.