How to Install OS X Yosemite on Any External Drive (Thumb Drive, USB Disk, etc)
We’ve covered how to install OS X Yosemite onto a separate partition of an internal hard disk and dual boot with OS X Mavericks, but many Mac users have wondered if it’s possible to install OS X 10.10 onto an external drive instead, thereby avoiding any modifications to the primary Mac hard drive or partition table. The answer is yes, you can install Yosemite onto an external disk, and yes it will be bootable, we’ll show you exactly how to do that.
The method described in this tutorial works to install a bootable OS X Yosemite instance onto any external disk, whether it’s a USB flash drive, a generic external hard drive, or whatever other external volume you have. If you’re going to try this, aim to use the fastest possible external drive for the best experience, otherwise you’ll find the entire process and overall OS X 10.10 experience to be quite slow running off an external disk. You can speed test your external drives with free third party tools if you’re not sure if the performance is particularly good or bad, but it’s safe to say that faster read and write speeds is better.
Requirements for Installing Yosemite onto an External Disk
- An external drive (USB thumb drive, hard drive, SD card, any external disk) with 16GB of space available or greater (the base OS X 10.10 installation uses about 10GB, and you’ll want some extra space for swap, caches, and test files)
- A Yosemite compatible Mac
- OS X Yosemite Dev Preview downloaded and ready to go
- Patience for a (likely) slower experience
The last point is important, because the experience very well be much slower than what you’re used to. Again, this is dependent on the speed of the external drive that Yosemite is being installed onto. If you use a slow external flash drive or old external hard disk, don’t be surprised if you encounter many beachballs, making this a very suboptimal experience and by no means representative of Yosemite performance in general.
Make the Destination External Drive / Volume Bootable
First up is making the external disk not a bootable volume, this is done through Disk Utility. The external drive will be formatted for this purpose, meaning it will be completely erased and all data on it will be lost.
- Launch Disk Utility in OS X, found in the /Applications/Utilities/ folder
- Attach the external drive to the Mac and select the newly attached drive from the list of volumes in Disk Utility
- Choose the “Erase” tab and be sure “Mac OS Extended (Journaled)” is selected as the format, give the drive an obvious name like “Yosemite External”, then choose “Erase” to format the volume – this removes all data from the destination drive, be sure you selected the proper volume here there is no turning back
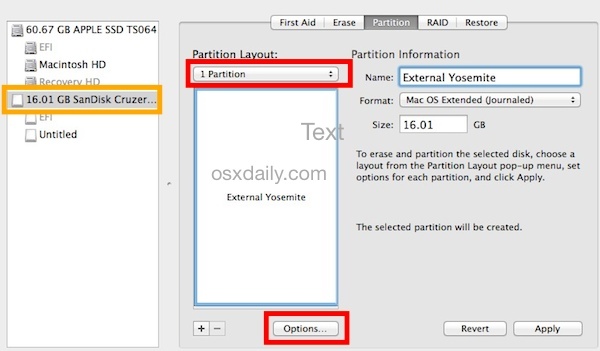
- Now go to the “Partition” tab and under ‘Partition Layout’ select “1 Partition” (you can choose multiple if you want to dual boot OS X Yosemite on partitions contained on the external drive, that’s your call but not what we’re covering here) and confirm the partition
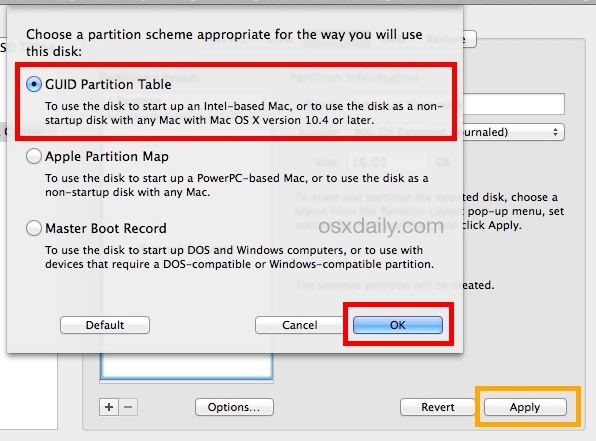
- Choose “Options” and select “GUID” then choose “Apply”
You’re now ready to install OS X Yosemite onto the external disk drive, whether it’s a USB hard disk, a flash drive or thumb drive, or whatever else you want to use. Just remember it’s going to be formatted.
Install OS X Yosemite onto the External Disk Drive
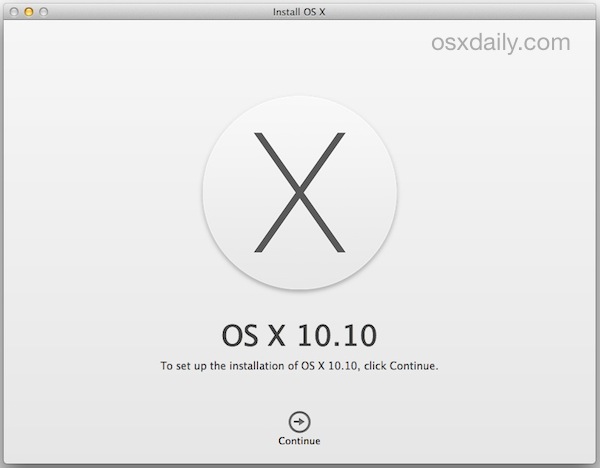
Now you’re ready to install OS X Yosemite onto the newly made bootable external disk. We assume you already have the OS X Yosemite downloaded and ready to go, if not you can get it from the Mac App Store through the Mac Dev Center.
- Launch the OS X Yosemite installer as if you were going to install as usual
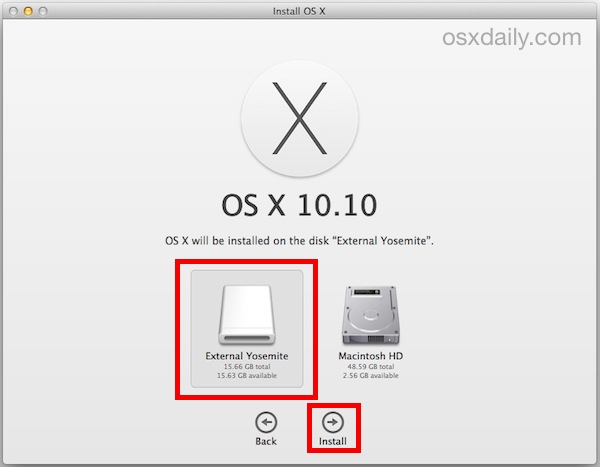
- Agree to the EULA and licensing terms, then choose “Show All Disks” to find the external volumes
- Select the external volume to install Yosemite onto and choose the “Install” button, enter the admin password when requested and the Mac will automatically reboot to begin the installation process as usual
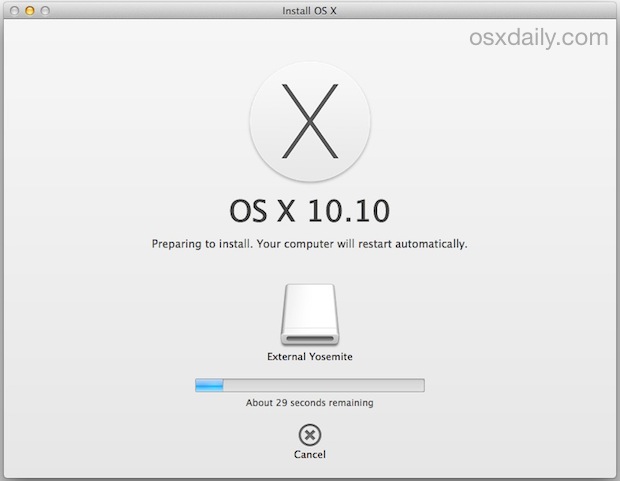
Installing onto an external drive may take a while, depending on the speed of the destination disk. Speaking of speed, it’s hard to overstate that performance of Yosemite (or OS X, or any other OS for that matter) running off an external volume is often considerably slower than running off an internal volume, and hardly representative of the true native experience of running on an full speed drive. Performance ultimately depends largely on the speed and connection of the external drive being used, but something like an USB 2.0 external drive is undoubtedly much slower than whatever drive is built internally into the Mac. On the other hand, a fast Thunderbolt or USB 3.0 drive may perform quite well for testing purposes.
Enjoy OS X Yosemite on your bootable external drive!
For those wondering, in creating this walkthrough I installed Yosemite and ran it off of a fairly generic ‘fast’ USB thumb drive. While performance is sufficient to get a feel of the general changes and appearance, the overall experience is tremendously slow when compared to running OS X Yosemite directly off of an internal SSD. Thus if you’re actually looking to test OS X 10.10 and certainly if you’re looking to develop for it, do yourself a favor and install it onto a fast drive or a separate partition instead.

For awareness, a pretty simple method to “temporarily revert” to Yosemite after loading El Capitan, is to use an external thunderbolt or USB drive, load Yosemite to it from another Mac running Yosemite, then plug it into the system you already installed El Capitan on, and use the Option key to select which device to boot from.
This worked without problems for me. Addresses an issue with only one application that I need infrequently.
Kirk
will this work with incompatible macs running osx snow leopard?
What if you can’t access the app store? Example: I’m experiencing what looks like a HDD failure and I want to install OSX to an external drive so that I (hopefully) can migrate the most important files over (no backup currently).
Is it still possible? I do not own another Mac, unfortunately.
Hi, I have a corrupted Macintosh HD. I bough a HD with the intention to recover by information (La Cie, 1Tb, usb 2.0/3.0).
Here is what what I’ve done so far;
1- turn the Mac on and hold option + R
2- select disk utility and make sure my HDD is formatted to Mac compatiblity.
3- Select retinstall Yosmite and choose my HDD, sign in and wait for installl.
4- After install is done, the system reboots and “OS X Installer” starts to launch.
5- In that new installer, I get a window of saying OS installing.. nothing happens for hours (bar stays 100%), so I click the bar up the screen and the installing window disappears. If I try to quit the install OS X, it says intallation not complete and gives me option.
I also notice that I select startup disk and then quit startup disk, a select languages appear on the top left but if I click it … does nothing. }
I only want to get to the migration assistant.
Any help is appreciated
Thanks
I have Yosemite on a Segon brand 64gb class 10 SDXC card in a 2012 MB Air. The 2012 MB Air firmware will not allow booting via USB3 but it will boot via USB2 or the SD card slot. It takes 10 minutes to boot from this particular SDXC card and everything runs very slowly. Wondering what, if any, flash memory device I could use that is faster.
Boot from the fast internal SSD hard drive if you want the OS to run at top speed.
Hi, can i use this method for replacing an internal hdd with a ssd?
Like this:
– connect external ssd to mac
– use the method named above (partition ssd, put yosemite on it)
– disconnect, power off, take the hdd out and put the ssd into the mac
– connect old hdd externally to mac, boot up, migrate from hdd
Should i be able to migrate like that, or is the partition i made on the ssd already registering a user?
I have a MBA 6,2 (mid 2013) with Mavericks.
Followed your instructions to install Yosemite beta 1 onto:
(i) 64 GB SDXC Card, using Migration Assistant to transfer only Apps & System files, resulting in about 21 GB free space on the card,
(ii) 16 GB SanDisk USB, without any files transferred, leaving 2.3 GB free space on the thumb drive.
It’s a bit slow, as warned in the article, but tolerable for testing purposes and works fine.
geezjan,
I have the same problem, still working on a fix. but I found a work around.
first,
Go into your yosemite OS> go to settings> startup disk> your maverick partition should be there> click your maverick partition disk, then click restart. Maverick should boot.
Hope this help!
Hi,
boot in installer and choose Apple logo. There you will find Startup disk. In next window you need just to select Macintosh HD and you are done.
I have a 2008 iMac running Mavericks. I connected an external Firewire drive, formatted it as instructed, and running the Yosemite installer from within Mavericks, I was able to install Yosemite on the external drive. Yosemite boots and runs fine.
The problem is that my Mavericks boot drive is now called “OS X Installer” and when I boot it I am put into the Yosemite installer. The odd thing is, however, that when I boot into Yosemite from the external drive, I can see that my Mavericks drive looks OK. All of my directories and files are there. I just can’t boot into Mavericks.
So first I had two bootable drives:
– Macintosh HD (Mavericks)
– Recovery-10.9
And now I have four bootable drives:
– OS X Installer (Mavericks contents, but boots into Yosemite installer
– Recovery-10.9
– Yosemite HD (Yosemite)
– Recovery-10.10
Any idea how to restore my Mavericks drive so I can boot into Mavericks?
Hi Geezjan,
You should boot in to the Yosemite installer, then go back to the previous step where you select the langue.
Then move your mouse pointer to the top left of the screen to find the Apple logo. Click it, and then in the drown down menu select bootdisk. Here you can select your 10.9 drive as the boot disk and reboot.
Now your problem should be solved.
Actually, I can boot the Mavericks drive–the one previously labeled “Macintosh HD” and now labeled “OS X Installer”. It’s just that it boots into the Yosemite installer.
If I boot the “Yosemite HD” drive, the one that really does contain Yosemite, I can then view what’s on the Mavericks drive and see my Mavericks system, including my home directory and files.
The problem is not that I can’t boot my Mavericks drive. It’s that when I do, I don’t get Mavericks, I get the Yosemite installer instead.
When I installed Yosemite on my external drive, it seems to have done something to my main (internal) drive. I am hoping to fix that.
I was able to resolve the issue by reinstalling Mavericks from the Recovery-10.9 partition. All my apps and settings appear to have been preserved.
Thank you! This saved me!!
Dear OSXDAILY,
I tried to install OS X 10.9 on USB 3.0 flash from Kingston.
But after installation it shows me stop sign.
how to fix it?
Hey great article! I think I’ll take it!
Do you need the Developer Preview version or is it ok to use the OS X Beta program version? Because I don’t have the developer account, but I want to try out the new OS. So I was thinking if this will work if I sign up for the OS X Beta program (https://appleseed.apple.com/sp/betaprogram/login_to_legal)?
I have that exact same USB drive too. I installed OS X Mavericks on it once and it was extremely slow. I would definately recommend doing it through a Thunderbolt or FireWire drive, not a USB drive.
When I follow this explanation, all goes as indicated up to the point after reboot – only the “Macintosh HD” drive is offered as an option to install. Not my newly formatted external HD.
Is a 1TB Western Digital “My Passport” External drive known to be incompatible with this procedure?
I have used the drive for file storage, for some months, but reformatted it just now to use as a Yosemite-test drive.
You must format the external drive as GUID and select it as the install destination before the reboot process begins, you may need to click a “show more options” button or something similar if only “Macintosh HD” is visible as a volume.
I did. It looks like it is going to reboot with the External disk. Then when it comes back from the reboot, only the built-in disk is offered. No menu option to select another disk is available.
But thanks for the time you took to reply.
try to unplug and plug it in again, it should work, but after installation it will not work at all.
You have to hold option and turn the computer on.
I have started installing it in one of my thumb drive having 32GB capacity. It’s been 9 hours and it’s still running.
Would it be any harm if I stop?
The installation needs to complete in order to function properly, if you stop it early the Yosemite install will not be completed and will not run.
i did the same thing. trying to install on a 32Gb USB 2 thumb drive; 1 minute installing takes 1 hour to install.
i forced to power down my mac with the power button to abort the Yosemite install. it started the Welcome Screen of Yosemite WITHOUT the thumb drive.. light panic here.
luckily, in the menubar you can choose your standard startup drive and it will directly start up your normal install again.
i think an image was still ‘mounted’ somewhere.
I have it running on a fast USB 3.0 Thumb Drive key thing, performance of the drive is like an older SSD, it’s quick enough for testing.
I like Yosemite so far. For the UI changes if they tone down the garish blue folder icons and add a ‘bold’ font option I think there will be no complaints about the appearance. Looking forward to seeing what the pro dark mode is like too.
I used a really nice LaCie USB 3 SSD external drive to perform my install. It works really well. So far, I’m really liking Yosemite. At this early stage, it’s a bit rough around the edges, but Apple will polish it up over the Summer.